Tuesday, August 31, 2010

Just because...

I took some cute pictures of the kids the other day and thought I would share. I LOVE the flower that Emma is wearing. It is the flame gerb from snapbandz.com under large flowers. I did a hair headband with one twist and one braid. The hair is secured with an elastic at the base of her neck. I thought it looked great with the "real" headband. Emma is wearing a dress that my friend Emily made. She has a shop www.sewdivineboutique1.etsy.com
Levi looks pretty cute too!


Friday, August 20, 2010

Twisted Attached Headband


This one took a little thought but it was so cute! I parted her hair about an inch or so back and to both ears. With the hair on the front I made 3 flip under knots.

Then I did the same thing at the base of her neck to her ears...3 more flip under knots (just make sure they "flip up" toward the pony tail.) After I had all six knots done I added the headband. I seperated the hair from the front middle pony in half. I took half the hair from the middle and the hair from one of the side ponies and did a rope braid and connected it to the large pony tail. I made sure that one section of hair was on the top of the pony and the other was on the bottom...this is what holds the headband on. I did the same thing on the other side and to the bottom of her hair.


With the remaining hair I just did a messy bun. I think if I do this again I will do ponies on the side of her head too so the headband stays a little better. The headband I used on this is a narrow green crochet headband with a turquoise ranuncula from snapbandz.com

Two Twists Headband.


This one was way simple and so cute! Start by parting the hair on either side. Part about two inches back and then to the back of the ear on each side. Take the rest of the hair and pull it back out of the way. Make a second part next to the first to make a box. Take that piece of hair and make a rope braid. Make another part and do it again. Make sure they are start in different spots so they are next to eachother and not over lapping.


I just had my little girl hold the twist while I made the second. Then slick the hair down on both sides and add the twist to the one side. Take the hair from the "headband" and bring it together at the base of her neck and secure with an elastic.

I added a brown dahlia on a clip from snapbandz.com. I LOVED this one. It would be cute to pull the rest of the hair up or curl it or something too, but I loved it just down and long. It was super windy outside and she was in a goofy mood...that explains the pictures! haha


Basket Weave


I saw something similar to this the other day and had to try it. I started by sectioning off a rectangle on the top and pulling it up out of the way.

Next I took the rest of the hair from ear to ear and slicked it back and secured it with an elastic. I think this works better with damp hair so you don't have fly aways.

With the hair on top I took it and parted it down the middle.

Then I took a plastic needle (you can get them at WalMart or other craft stores) and threaded a small piece of hair into it. To do this I used a piece of dental floss...made a loop and put through the eye of the needle...then put the hair through the loop and pulled so the hair went through the needle.


Then I just went in and out of the hair on one side and pulled it through. I continued this all the way back and on the other side. I didn't make it very even and will have to practice that a little. I just did it randomly and in a hurry.


When I finished all the weave I took a piece of hair from the pony and wrapped it around the elastic and pulled it through with my topsy tail to hide the elastic.
I topped this one off with a Spikey Purple Hydrangea from snapbandz.com It would be way cute to curl the back of the hair or just the piecies in the ponytail and the weaved sections. You could also do this with two pony tails. It was a little time consuming...but way cute!


Wednesday, August 18, 2010

Sliced Pizza updo

I know it's a funny name but hopefully it will make sense at the end. For this one I started by making a triangle in the front of her hair that went to the crown of her head and flipped the hair under. I did this on both sides as well so they all pointed to the crown of her head. Remember to flip the ponies under you can use a topsy tail, a pen, a comb or just your finger. Just make sure you put the elastic in so the hair is loose enough to flip under and then pull tight.

When you have the three ponies done you can leave it like that or take the hair from the ponies and do a three strand braid like this. (yes she is sitting in her little brother's bumbo chair.)

Or I decided to go ahead and mirror image the 3 ponies. Just do the same thing on the bottom...3 triangle flip under ponies pointing to the crown of her head.

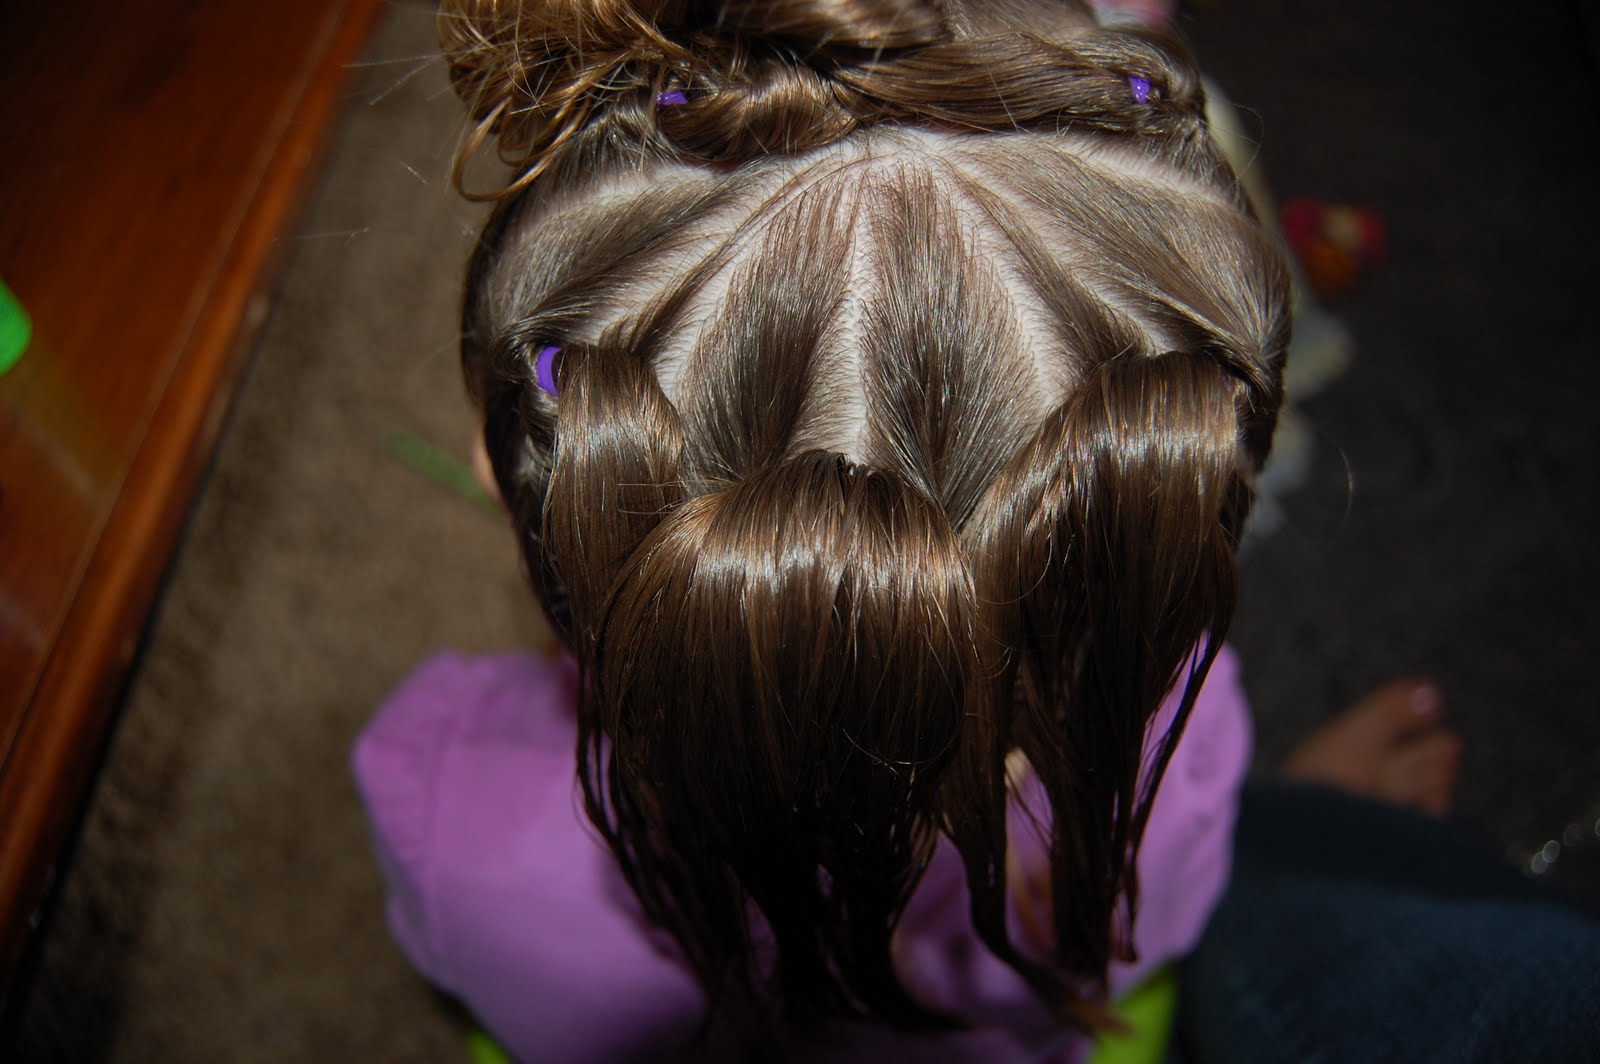
When I had all six ponies finished I curled the remaining hair and pinned up the longer pieces. I topped it off with my favorite flower, the cream daisy mum, from snapbandz.com The hair is split in 6 triangles like a pizza. Get it?


Four braids on a slant


This hair do was super easy and turned out way cute. For this one you will just be working with half her hair. You can take the back and put in a pony tail out of your way if that helps. I started by combing the hair from the right toward the left of her head. I sectioned the first piece of hair at an angle towards her right ear. I just did a simple 3 strand braid but a rope braid or any other kind would work too. I secured the end with an elastic.

You want all the braids to point to the same spot where you will secure them together. I did it so they all pointed toward the back left. I continued this process until I had four braids at the front. I liked doing the parts on an angle because from the front it looks like the hair is going one way but the braids actually go the opposite.

When I had all four braids I just took them and added an elastic where they would naturally hang and removed the elastics that were holding the individual braids. I added a mini cosmo from snapbandz.com to top it off.
I thought it turned out great. Instead of using a clip or attaching the flower directly to the hair I just used an elastic. I took one tiny elastic and wrapped it around the stud snap and then snapped the flower onto it so the elastic was connected to the flower. Then I just wrapped the elastic around the other one. Voila!


Two rope braids+half pony

I started this one by sectioning a square on top of her head and adding an elastic to the back right side. You should have hair still down on the right and left sides of her head.
With the hair on the left side of the pony I split it in half from the front to the back of her head. With the section of hair closest to the pony I made a rope braid and secured it to the pony. I did the same thing with the remaining hair on the left side. Just make sure that the two braids start in different spots so they are next to eachother and not overlapping. (Remember to do the rope braid you just take two pieces of hair, twist them the same direction and then twist the two twists together the opposite way you twisted the twists. haha I promise it's simple.)

With the hair on the right side of the pony I combed it toward the pony and wrapped it around the elastic twice.

I used my topsy tail to take the hair down through itself hiding the elastic. If you don't have a topsy tail I have seen people just use a pipe cleaner and make their own. Very simple...and cheap!

So cute!
It would look good with the hair down and straight but I decided to adds some curls with my good old curling iron. Love it!